Irish Soda Bread: A Crisp-Crusted Everyday Loaf
- A four-ingredient quick bread
- Yield, timing, and temperature
- Ingredients
- Prepare before mixing
- Mix lightly and quickly
- Shape without kneading
- Cut a decisive cross
- Bake until the centre is set
- Cool before slicing
- Why soda and buttermilk work
- Buttermilk substitutions
- Dense, flat, bitter, or gummy bread
- Store for quality and safety
A four-ingredient quick bread
This white soda bread uses plain flour, bicarbonate of soda, salt, and cultured buttermilk. There is no yeast and no rising period. Acid in the buttermilk reacts with bicarbonate, so the loaf moves from bowl to oven promptly.
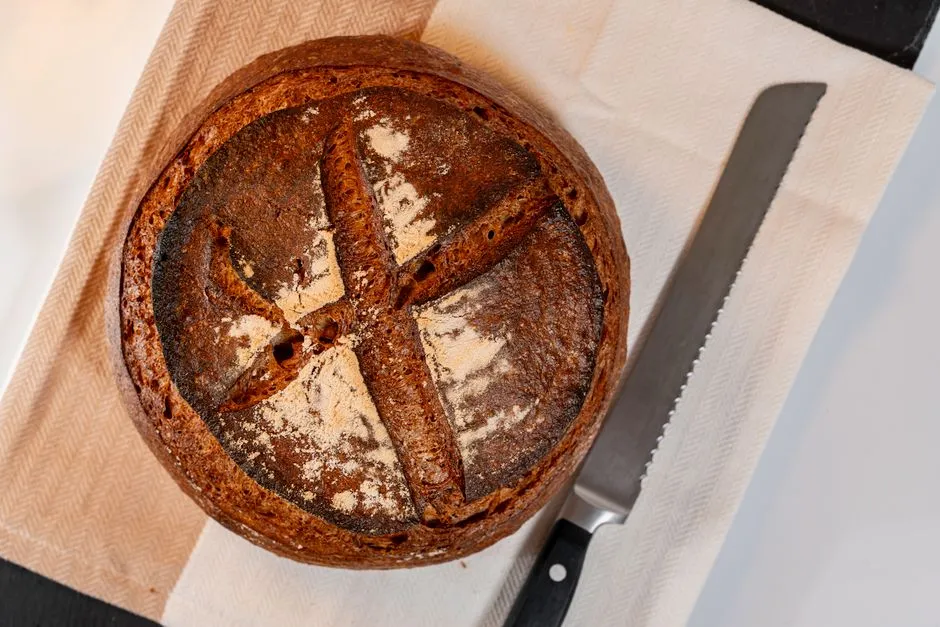
The result is a round loaf with a crisp crust and close, tender crumb. It is excellent with soup or beef and stout stew, and it makes no claim to remain at peak condition until next Thursday. Soda bread knows it is best fresh and has organized its personality accordingly.
This is an original gram-first formula. For a useful point of comparison, Ireland's food board publishes several traditional formulas, including a white soda bread with egg and butter. Recipes legitimately differ; “traditional” has never meant one bowl held under state guard.
Yield, timing, and temperature
- Yield: 1 round loaf, about 10 slices
- Mixing and shaping: 15 minutes
- Baking: 35–45 minutes
- Cooling before slicing: at least 30 minutes
- Total: about 1 hour 25 minutes
Heat a conventional oven to 200°C/392°F. The Fahrenheit figure is recomputed as (200 × 9 ÷ 5) + 32 = 392. If the oven uses ten-degree Fahrenheit steps, 390°F is the closest setting. Follow the appliance maker's adjustment for fan convection.
Line a flat baking tray with parchment or dust it lightly with flour. A wire rack helps cooling. An instant-read thermometer provides a more dependable doneness check than knocking on bread and interpreting its emotional state.
Ingredients
- 450 g plain flour, plus up to 15 g for shaping
- 5 g bicarbonate of soda, also called bread soda or baking soda
- 6 g fine salt
- 350 mL cultured buttermilk, plus up to 50 mL as needed
The starting liquid is 350 mL. Flour absorption and buttermilk thickness vary, so reserve 50 mL and add it gradually. This is a controlled adjustment, not a fifth ingredient emerging from the mist.
Use bicarbonate of soda, not baking powder. They are different leaveners. Check the date and break up any lumps before measuring.
Prepare before mixing
Heat the oven fully before combining wet and dry ingredients. Put the tray near the bowl, clear a small shaping area, and have a sharp knife ready.
Shake the buttermilk container and measure 350 mL. Keep the additional 50 mL beside the bowl. Buttermilk should be cold and within its labelled use period. Discard it if storage has been unsafe or it shows spoilage beyond the normal cultured tang.
Whisk the flour, bicarbonate, and salt in a large bowl for 30 seconds. Pay particular attention to the soda. A concentrated pocket creates a bitter, soapy bite that no quantity of charming butter can fully rehabilitate.
Mix lightly and quickly
Make a well in the dry ingredients. Pour in the 350 mL buttermilk. Use a stiff spatula or open hand to sweep flour from the sides into the centre.
Mix only until most dry flour disappears. Pinch or fold the last loose patches into the dough. Do not beat it smooth.
If the mixture will not come together and dry flour remains at the bottom, add reserved buttermilk 10 mL at a time. Stop when the dough is soft, cohesive, and slightly tacky. You may use 350 mL, the full 400 mL, or somewhere between.
The dough should not pour like cake batter. If it is very wet, dust the shaping surface with part of the reserved 15 g flour rather than tipping half the bag into the bowl. Too much late flour makes a dry seam and dense loaf.
Shape without kneading
Turn the dough onto the lightly floured surface. Flour your hands. Fold the outside toward the centre four or five times—just enough to create a rough round.
Turn the seam downward and pat the loaf to about 18 cm wide and 4–5 cm high. These dimensions are guides, not architectural approval. A very tall narrow loaf takes longer to bake through; a flat wide loaf dries sooner.
Transfer to the prepared tray. Work briskly but without panic. The reaction begins when buttermilk meets soda, yet the loaf will not file a complaint because shaping took 90 seconds.
Cut a decisive cross
Use a sharp knife to cut a cross about 1.5 cm deep from near one edge toward the other. The cuts create planned expansion lines and help heat reach the thick centre.
A shallow scratch may close as the loaf rises, encouraging cracks elsewhere. An excessively deep cut divides the round into four independent scones. Aim through the surface and into the dough, not through the tray.
Folklore offers additional reasons for the cross. They are part of the bread's cultural story, but the practical baking function needs no supernatural subcontractor.
Bake until the centre is set
Put the loaf into the fully heated 200°C/392°F oven. Bake for 35 minutes without opening the door during the first 25.
At 35 minutes, inspect it. The crust should be well browned and the cross dry rather than gummy. Lift the loaf carefully and tap the base; a hollow sound is a traditional clue but can be subjective.
For a clearer check, insert an instant-read thermometer through the side into the centre. Aim for about 96°C/205°F. The conversion is (96 × 9 ÷ 5) + 32 = 204.8°F, rounded to 205°F.
If the centre is cooler or doughy, bake another five to ten minutes. If the crust darkens before the middle is ready, cover the loaf loosely with foil. Do not remove it because the outside looks confidently Irish.
Cool before slicing
Move the baked loaf to a wire rack. Cool at least 30 minutes. Steam continues to move through the crumb; cutting immediately compresses it and can make a properly baked centre appear gummy.
For a softer crust, drape a clean tea towel loosely over the warm bread. For a crisper crust, leave it uncovered. Do not seal it in plastic while warm because trapped condensation softens the crust and encourages moisture at the surface.
Slice with a serrated knife. The loaf is sturdy but crumbly, so sawing gently works better than pressing straight down like a disappointed lumberjack.
Why soda and buttermilk work
Bicarbonate of soda is alkaline. Cultured buttermilk supplies acid. When wet ingredients bring them together, they produce carbon dioxide gas. The dough's flour structure traps some gas while oven heat sets the loaf.
That is why the recipe needs enough acid, fresh soda, limited mixing, and prompt baking. Extra bicarbonate does not create unlimited lift. Once acid is used up, excess soda remains, bringing alkaline flavour and sometimes yellowish colour.
Unlike a yeast dough, this loaf does not benefit from a long knead or countertop rise. More handling develops gluten and expels gas, producing a tighter crumb.
Buttermilk substitutions
Cultured buttermilk gives the most predictable acidity and thickness for this formula. If unavailable, combine 15 mL lemon juice with enough milk to total 350 mL. Rest five minutes, then use it as the starting liquid; keep another small amount of milk available if the dough remains dry.
This substitute may be thinner and less tangy than cultured buttermilk, so add it gradually. Vinegar can also acidify milk, but flavours vary. Do not substitute plain milk without acid because the soda then lacks the reaction the recipe expects.
Plant-based milk plus acid may work, but protein, sweetness, additives, and thickness change browning and texture. Choose a product suited to dietary and allergen needs. This wheat recipe is not gluten-free; a one-for-one flour swap requires a formula developed for that blend.
Dense, flat, bitter, or gummy bread
Dense bread may come from old soda, insufficient liquid, overmixing, too much shaping flour, or delay before baking. Weigh ingredients and get the oven ready first.
A flat loaf may have been too wet, shaped too wide, or under-supported by low-protein flour. Add liquid cautiously. This dough should be soft, not pourable.
A bitter or soapy taste points toward too much bicarbonate, poor distribution, or insufficient acid. Five grams is enough for this formula. Whisk it thoroughly with the flour.
A gummy centre usually needs more baking or more cooling. Check the centre temperature and wait before slicing. If the outside browns early, foil buys the middle time.
Store for quality and safety
Cool completely, then wrap airtight. Keep at room temperature for about two days for best quality. In very warm or humid conditions, use judgment and local food-safety guidance.
For longer storage, slice the cool loaf, separate slices with parchment if useful, and freeze airtight. Toast from frozen or thaw only what you need. Refrigeration generally speeds staling, though it may be preferable to a hot, damp room.
Discard mouldy bread. Bread is porous, so trimming the visible spot does not reliably remove unseen growth. Do not conduct a smell-and-scrape negotiation.
Serve the loaf beside stew, soup, chowder, eggs, cheese, or simply butter. Our Irish pub food guide puts brown and white soda breads in menu context, while the Lahinch golf trip guide explains why spare socks may be the most important seasoning after eighteen holes.
The formula is quick, but quick is not careless. Measure, mix just enough, cut deeply, bake through, and let the crumb settle. Rustic bread deserves accurate instructions too.